Controller Ports / Front Panel Kit
Overview
This guide covers both the Controller Ports and Front Panel Kit due to their shared disassembly steps and close integration.
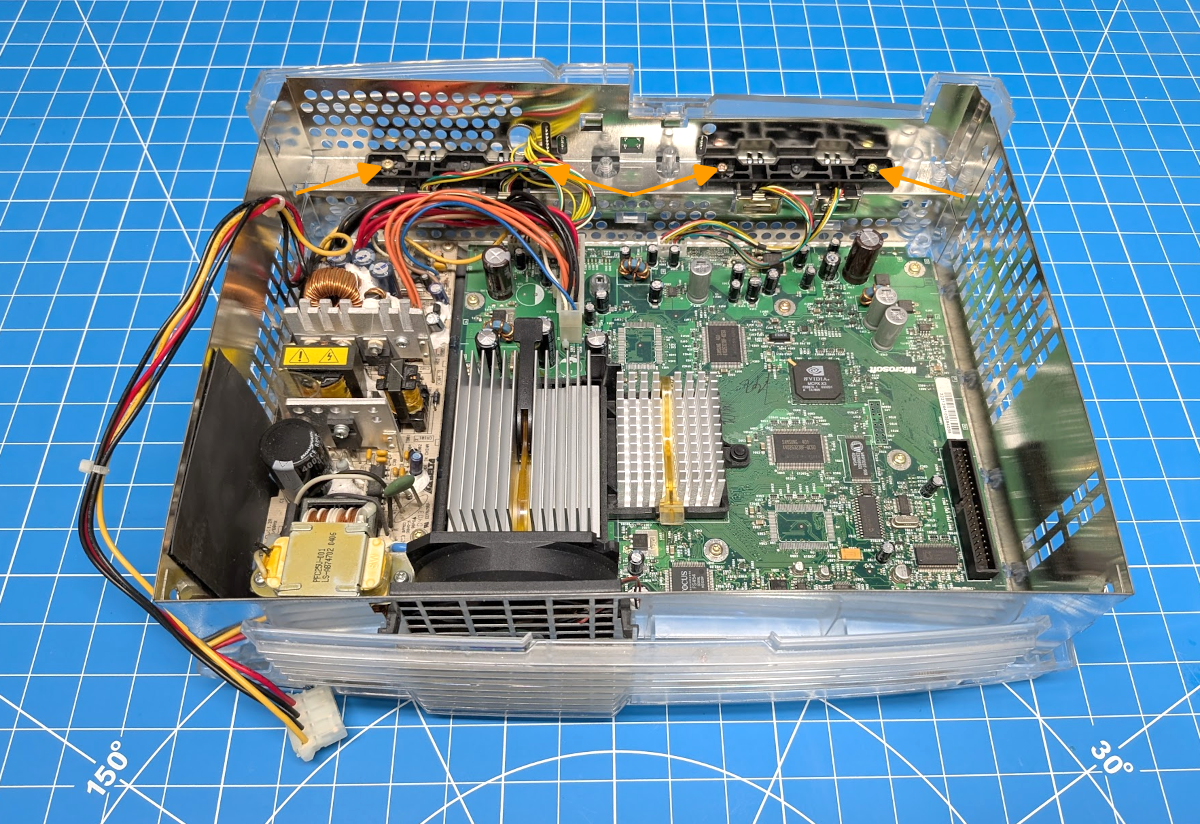
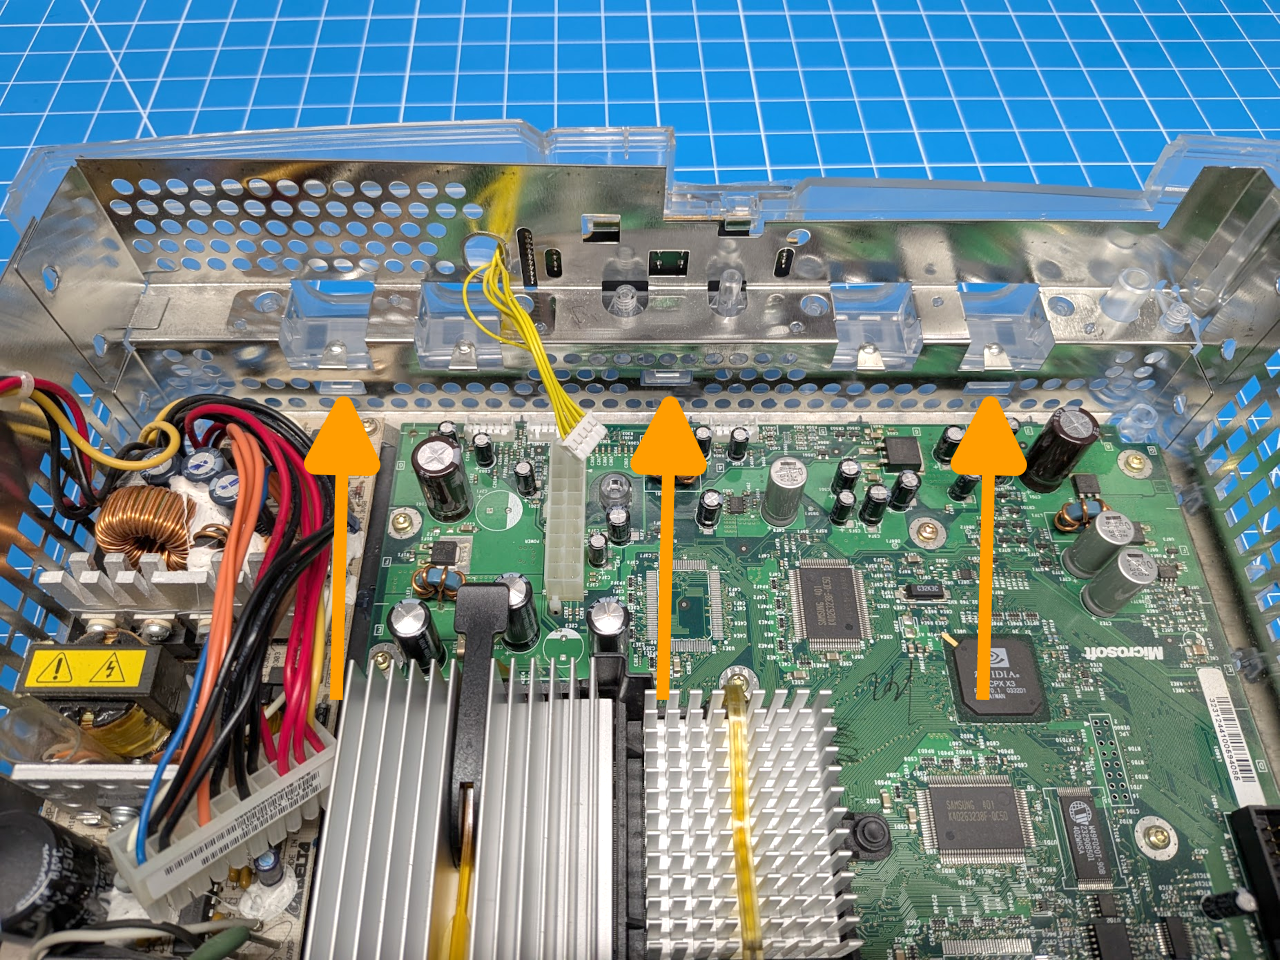
Wiring Overview
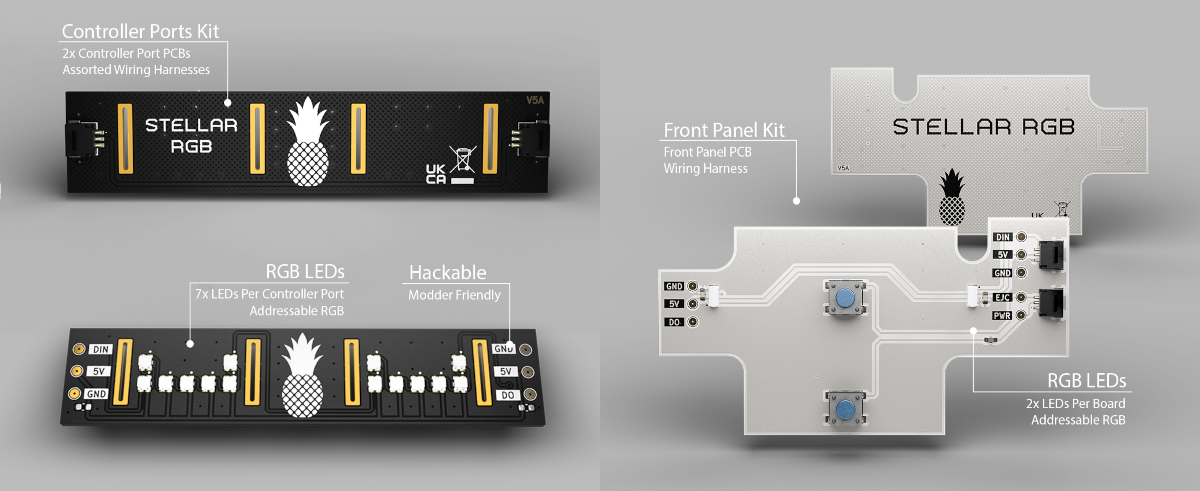
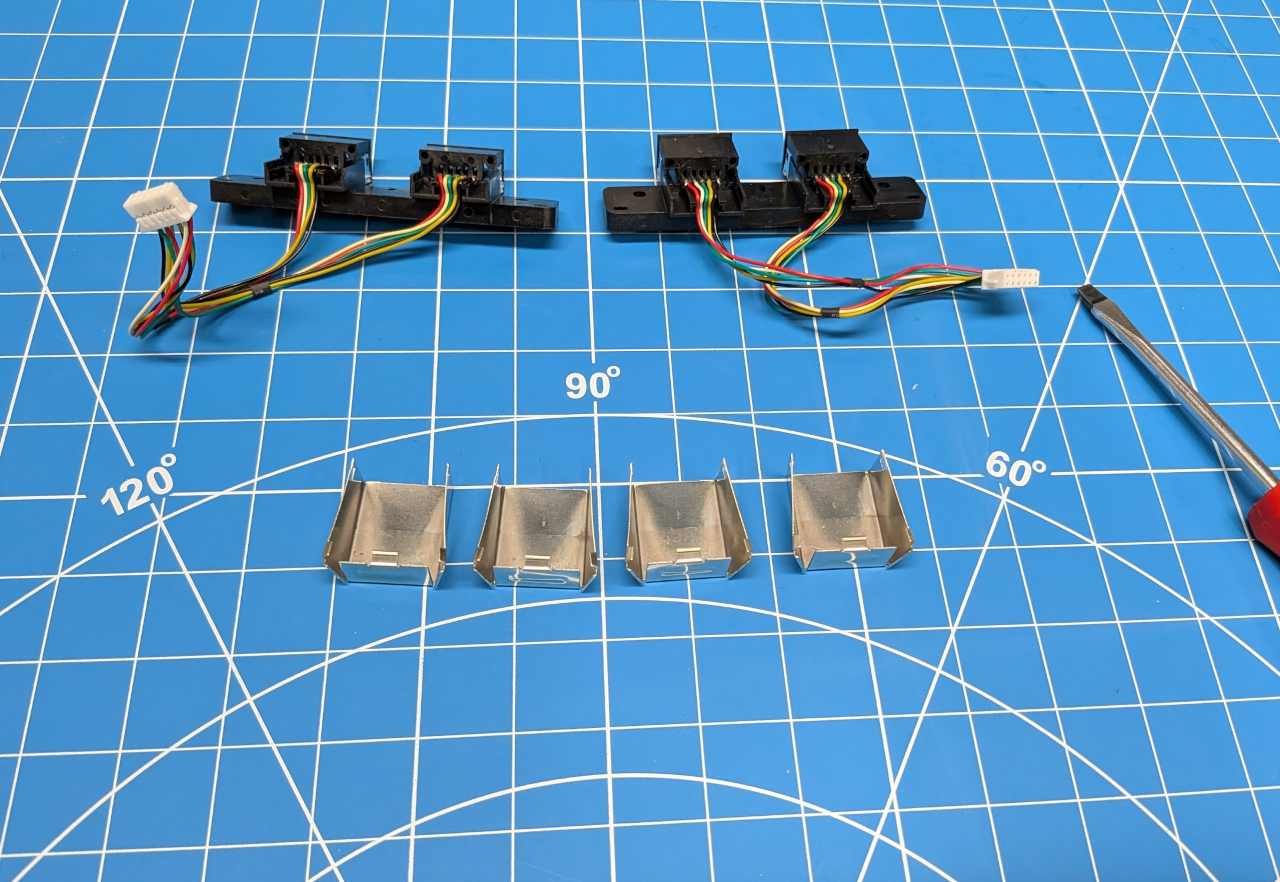
Controller Ports Kit / Controller Ports + Front Panel Kit
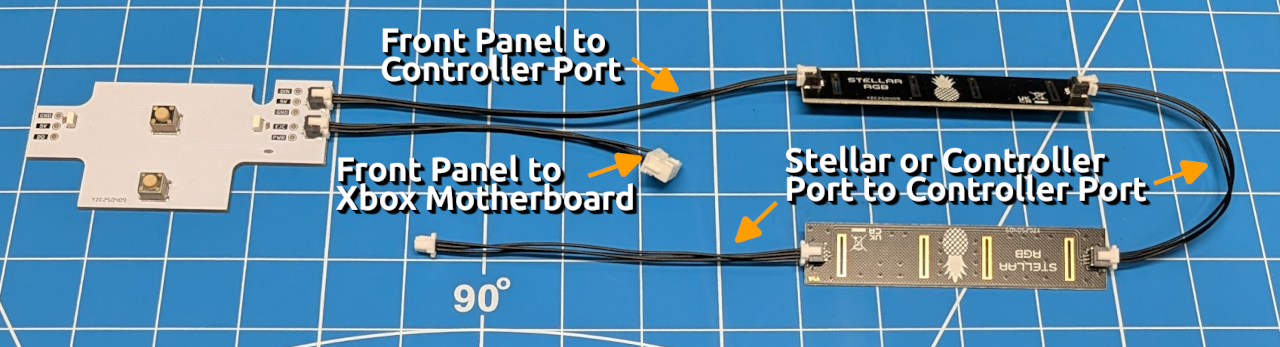
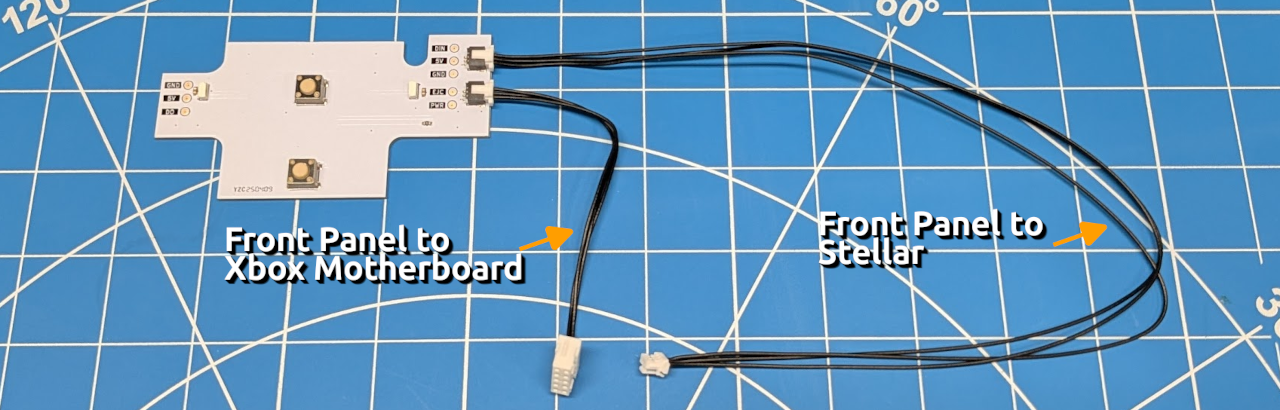
Front Panel Kit
Disassembly
Removing the USB ports makes it easier to access the front panel. This is recommended even if you are only installing the Front Panel Kit.
Front Panel Kit
The front panel is secured on each side by three clips. The most effective method we’ve found is to insert a flathead screwdriver between the bottom and middle clips. While applying gentle pressure with the screwdriver, use your finger to press outwards on the top of the front panel. This should allow the clips to slide past the plastic they rest against.
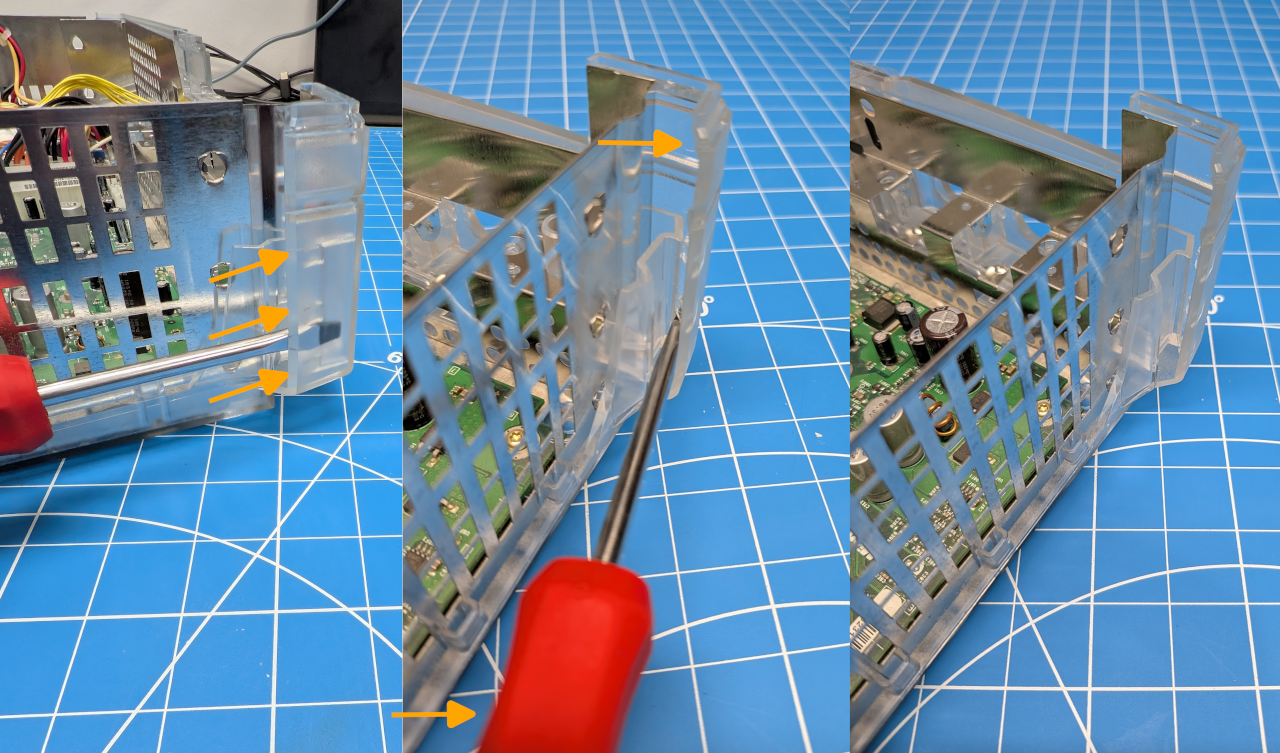
Once the clips on one side are disengaged, press up on the three front-facing clips to fully remove the panel.
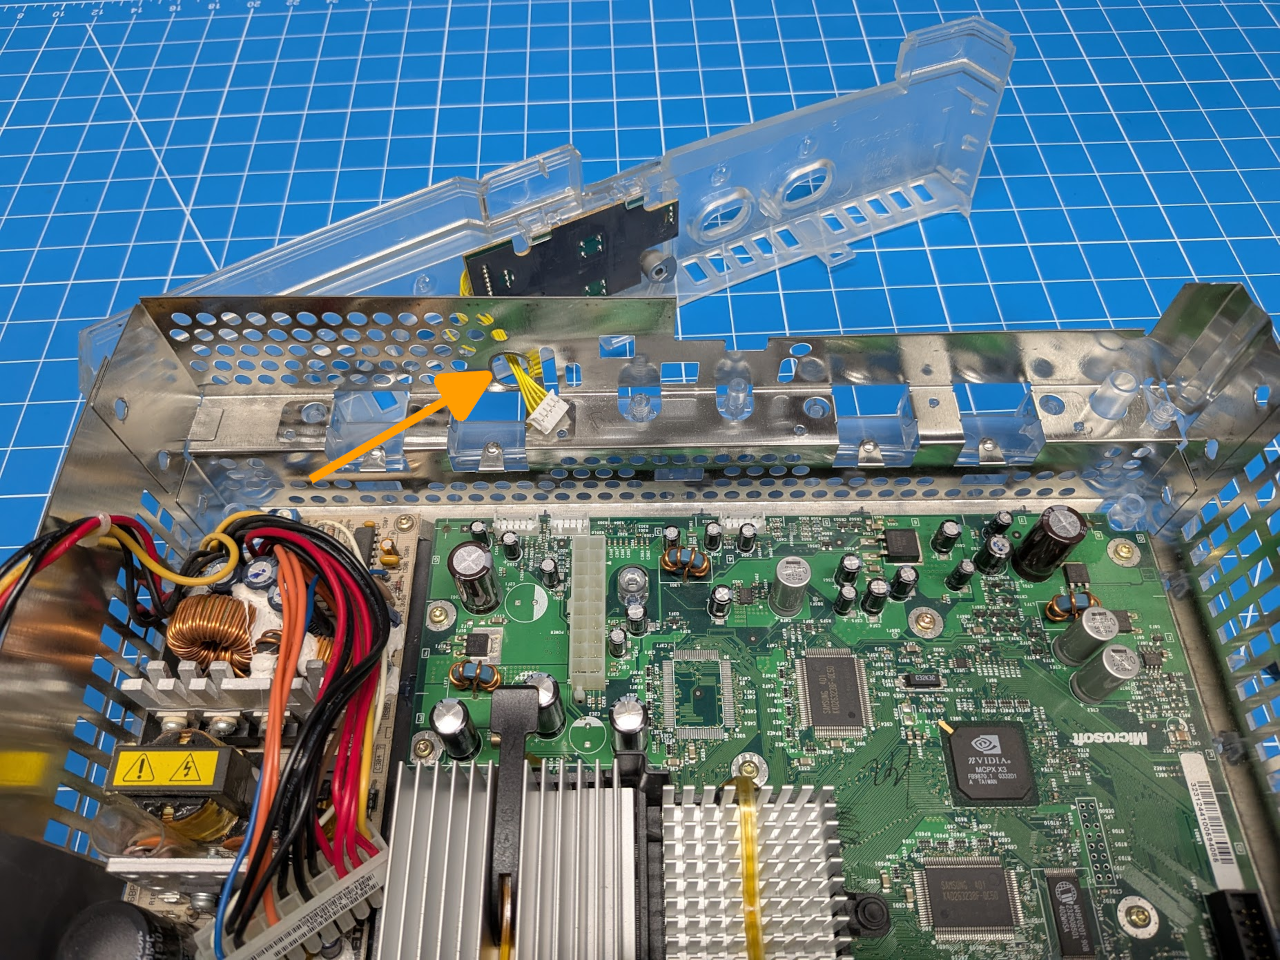
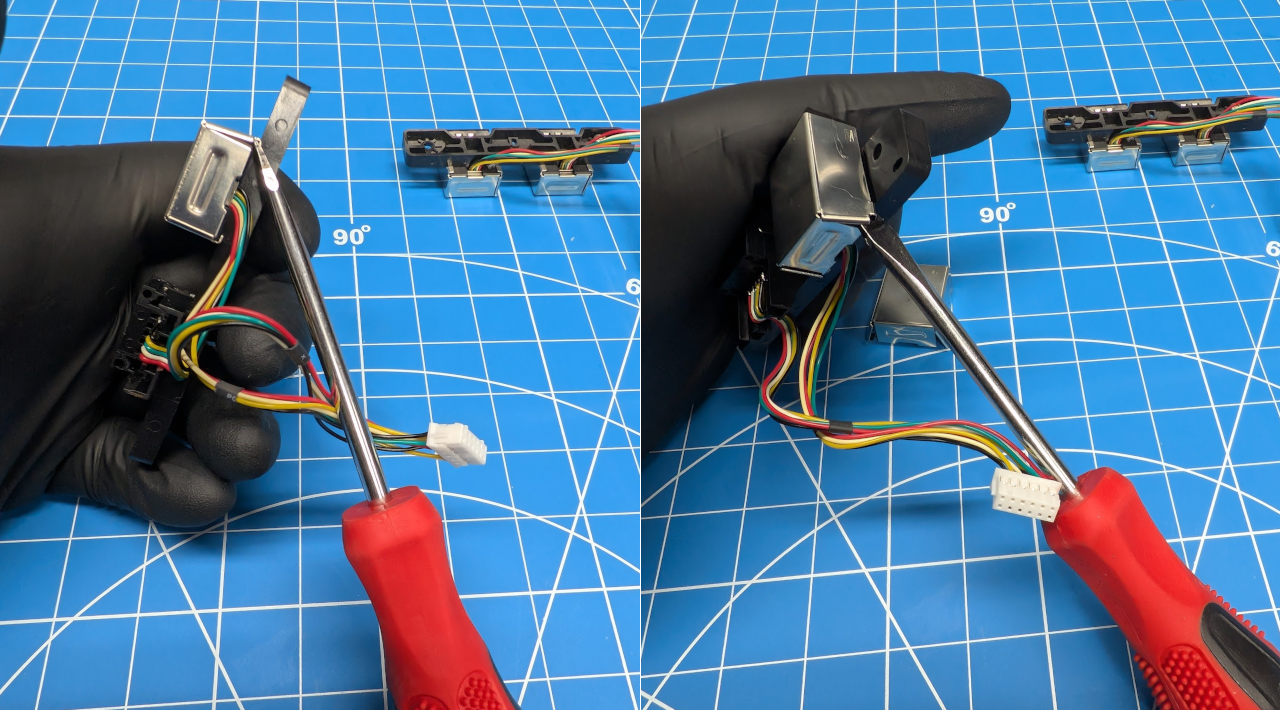
Carefully feed the front panel cable through the metal shield to fully detach the panel from the Xbox.
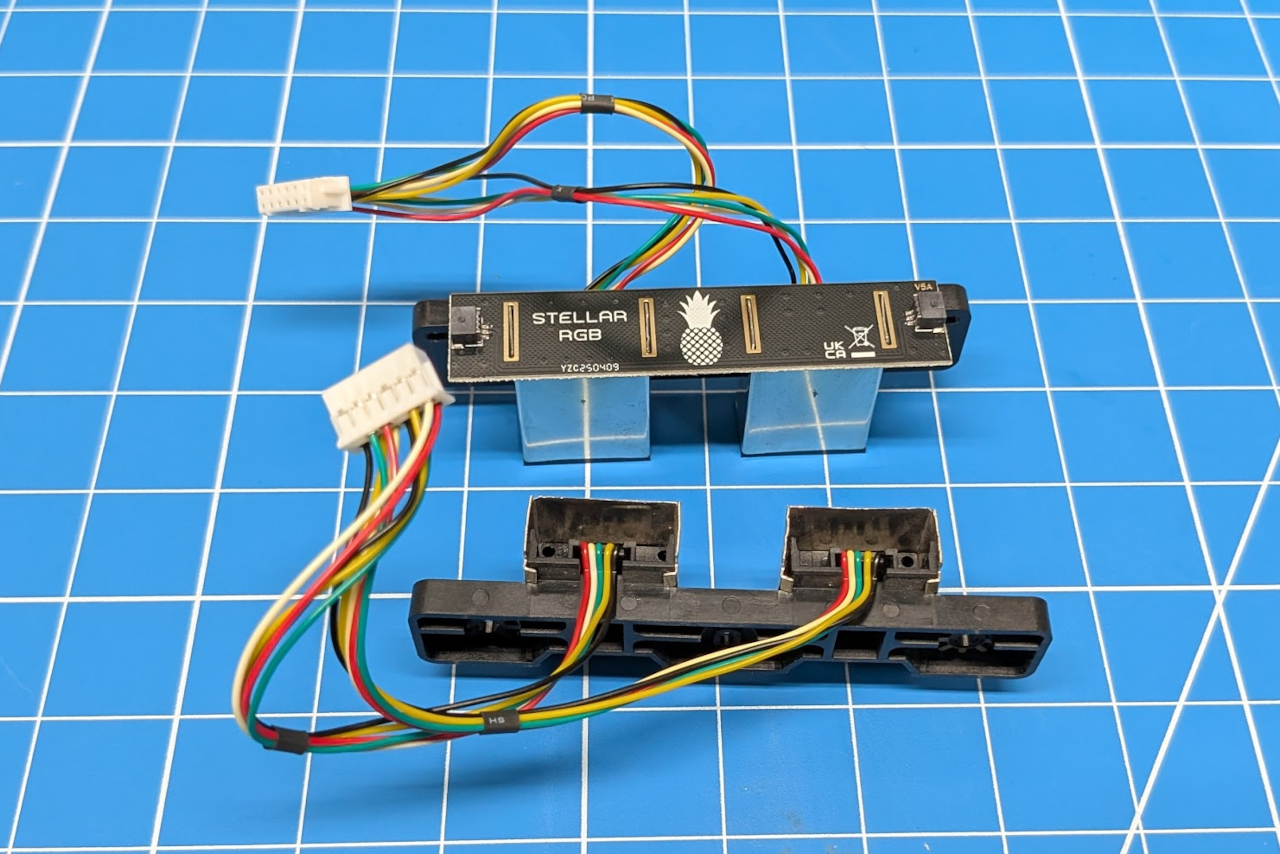
To remove the PCB from the front panel, press down on the plastic tab holding it in place. The PCB should slide out with minimal effort.
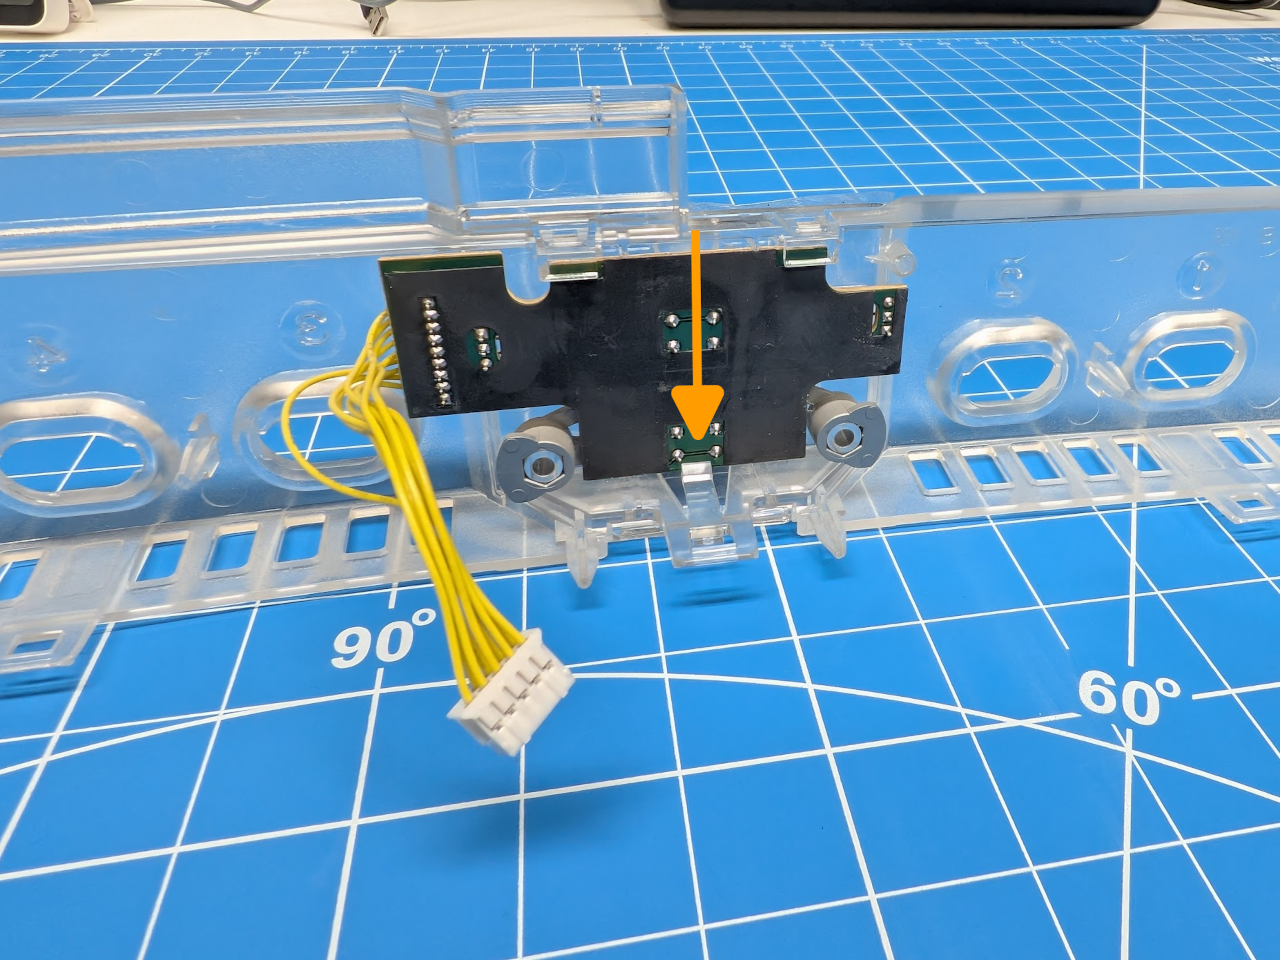
Slide the Stellar RGB module into the panel until it clicks past the clip and locks into place.
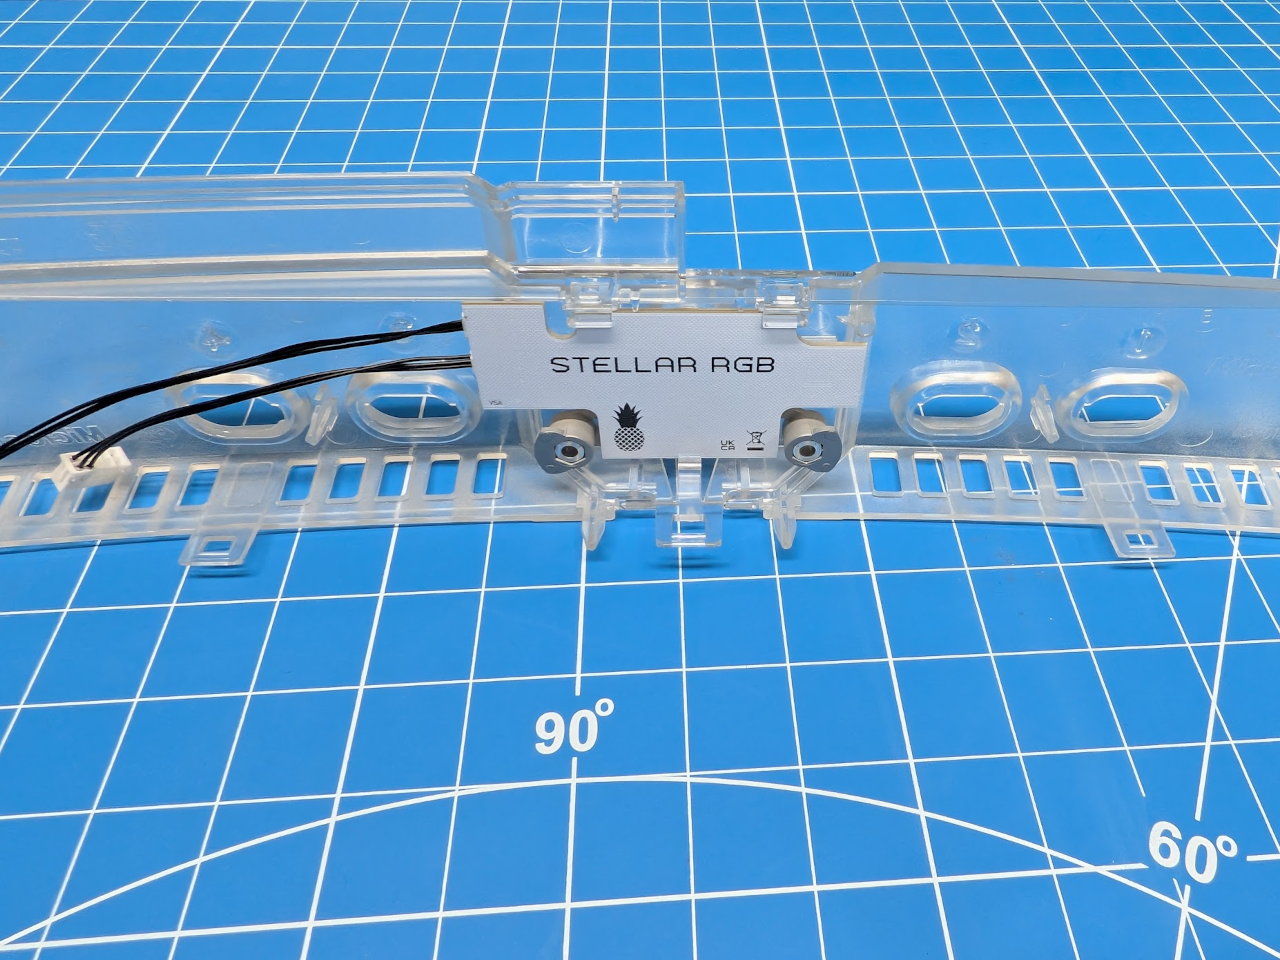
Pass the cables through the metal shield and gently press the front panel back onto the shell.
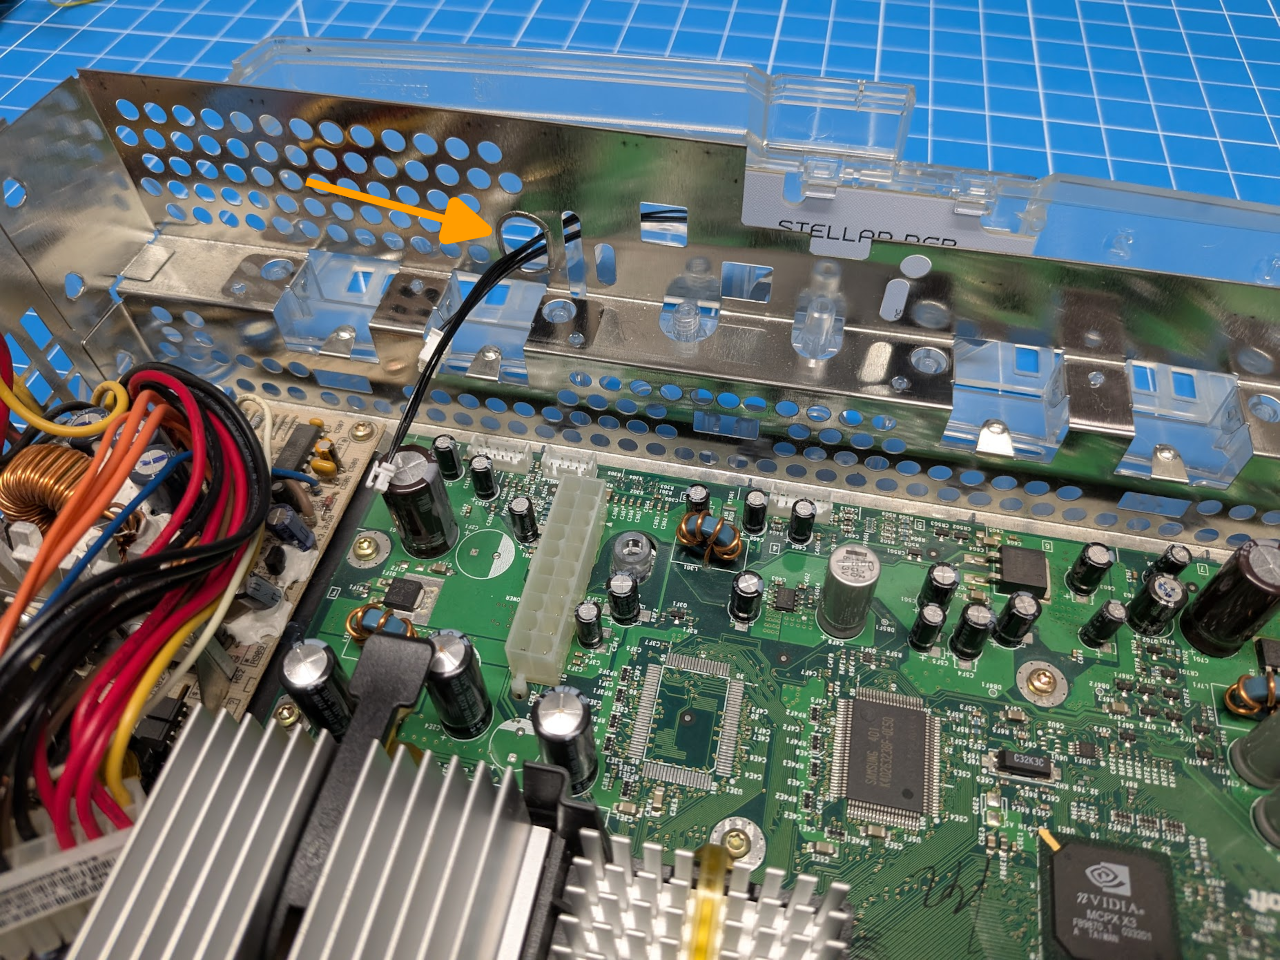
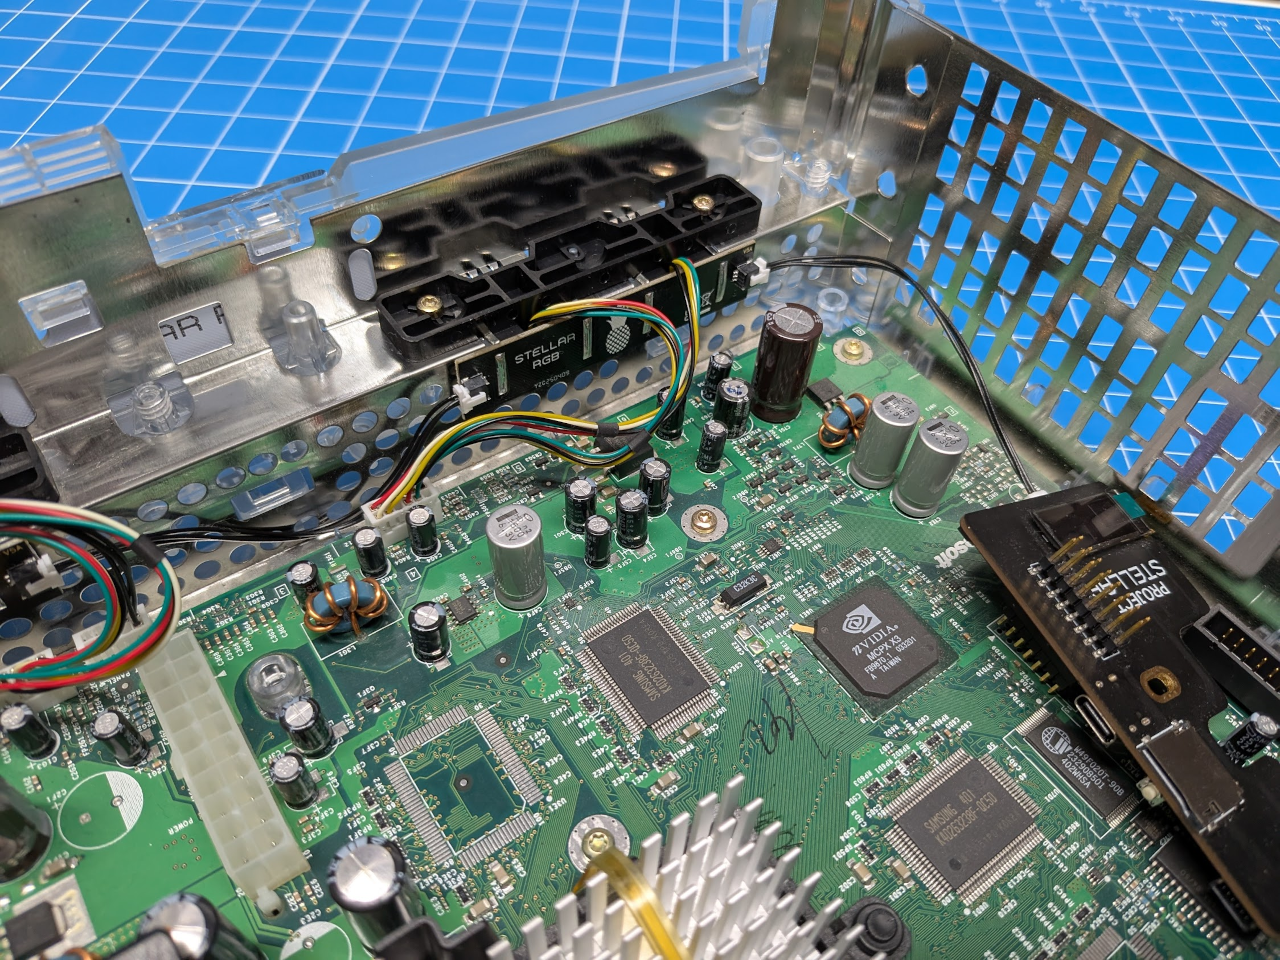
If you are only installing the Front Panel Kit, connect the RGB cable to Stellar and the front panel cable to the Xbox motherboard.
Disconnect Stellar from the LPC header before connecting the RGB cable. This is to avoid stress and damage to the LPC header on Stellar.
Controller Ports Kit
Use a flathead screwdriver to carefully loosen the metal shielding around each USB port. Start by pushing on the bottom metal tab that wraps around the top. Once there's a slight gap, slide the screwdriver under the shielding and gently twist. This should release the metal on that side of the connector.
Repeat this process for all four controller ports.
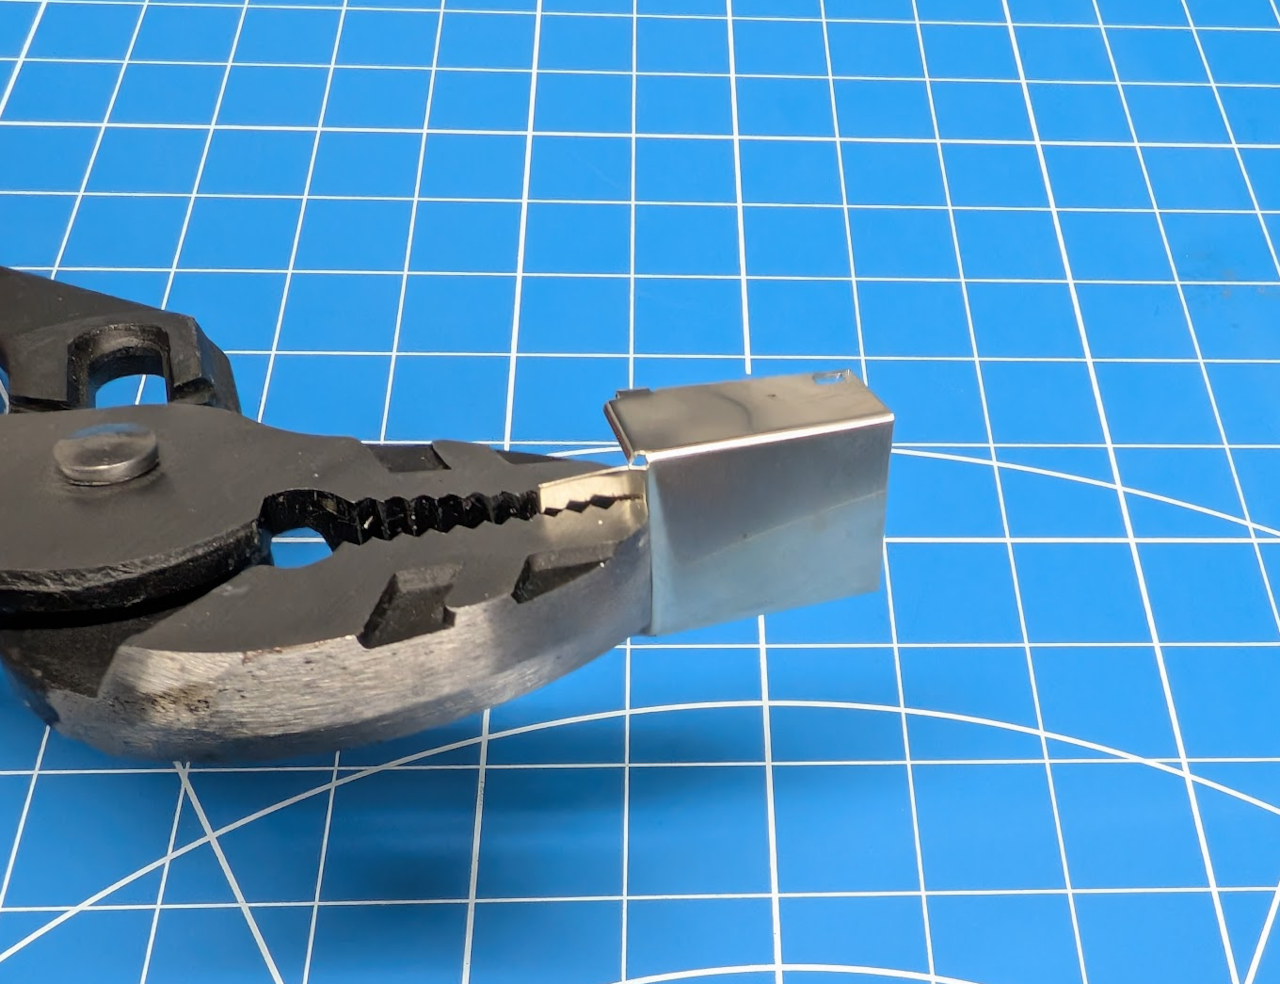
Next, use a pair of pliers and grip the shielding near the fold. Bend the metal along the existing crease to weaken it. Continue bending it back and forth until the metal fatigues and breaks off cleanly.
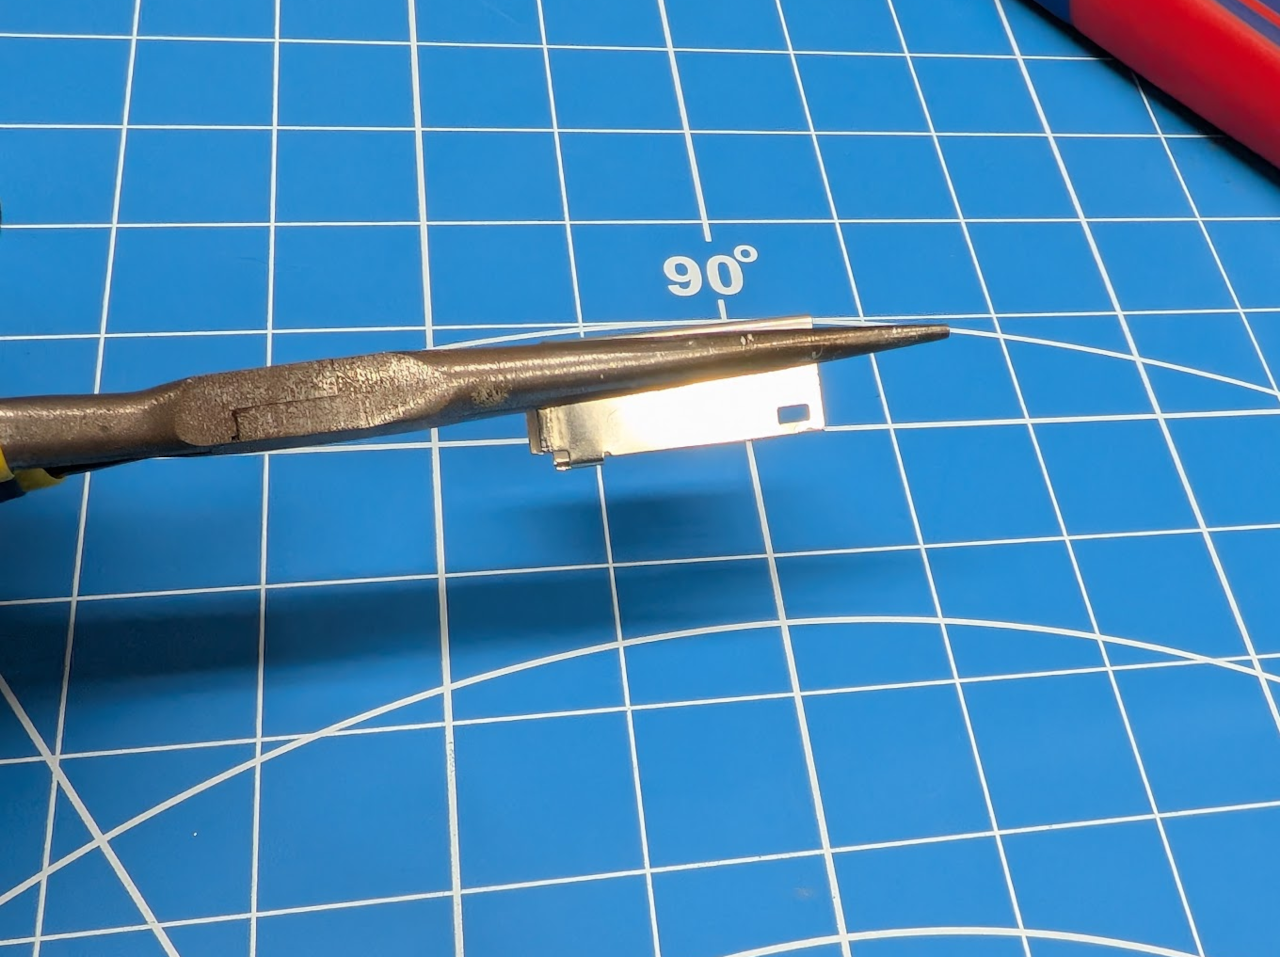
Using a pair of pliers, bend the tabs on the shielding flat.
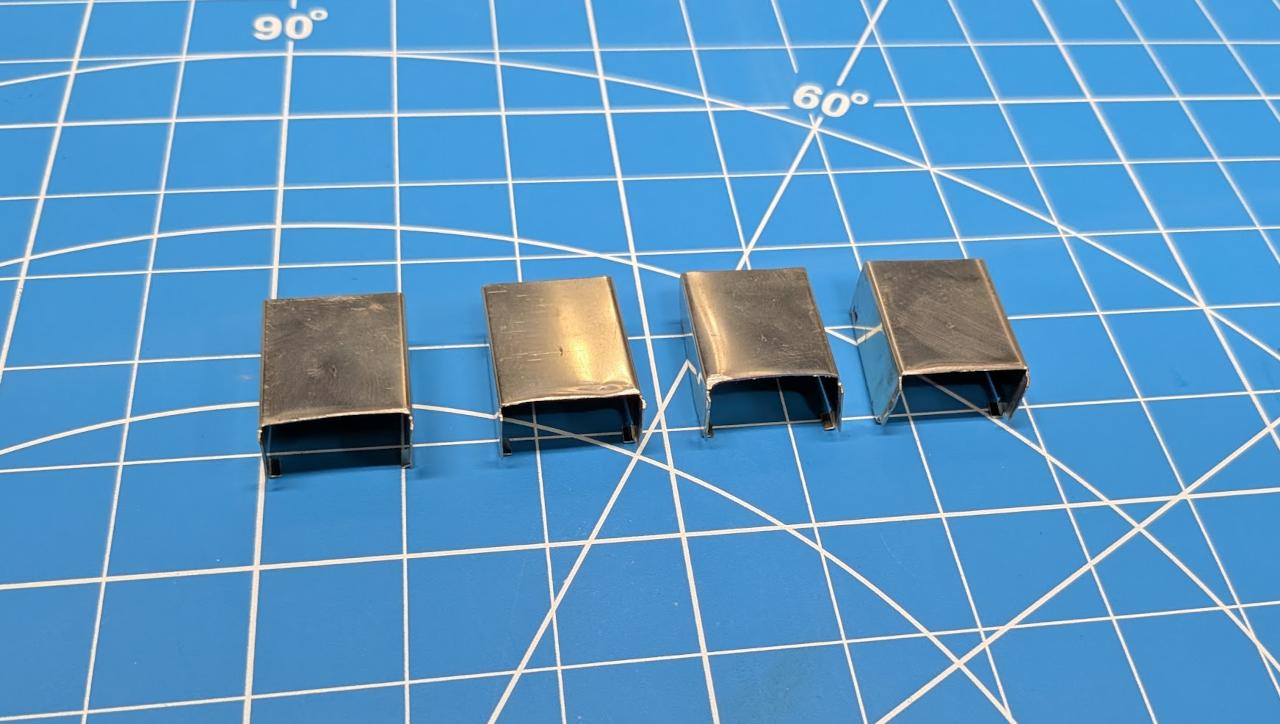
Repeat this process for all four ports. Once finished, try to reshape the metal shielding to its original form. It does not need to be perfect. The Xbox shell will hold it firmly in place once reassembled.
If you're unhappy with the cut edges, use a metal or nail file to smooth them out.
Slide the metal shielding back onto the controller ports from the rear side.
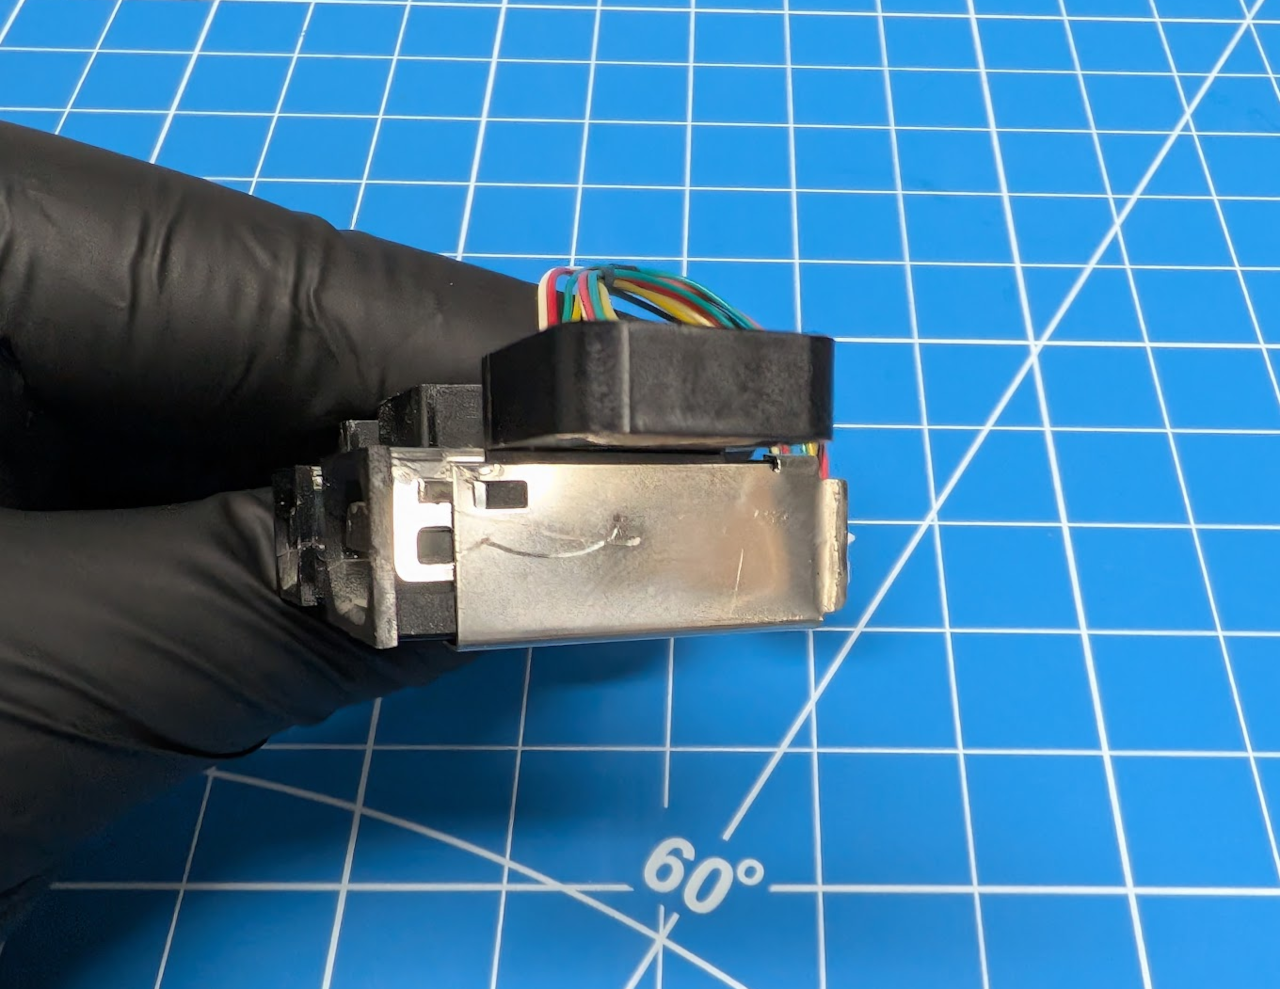
Place the Stellar RGB PCB onto the shielding. Orientation is critical. The logos and text should appear upright when installed in the Xbox. Refer to the image below for correct placement.
Optional. You may solder the PCB to the shielding. If you do, use only a small amount of solder.
Excessive solder can wick down the metal and potentially damage both the controller port and the RGB board.
Reinstall the controller ports into the Xbox.
If you're also installing the Front Panel Kit, connect its RGB cable to the last connector in the chain (next to controller port 4).
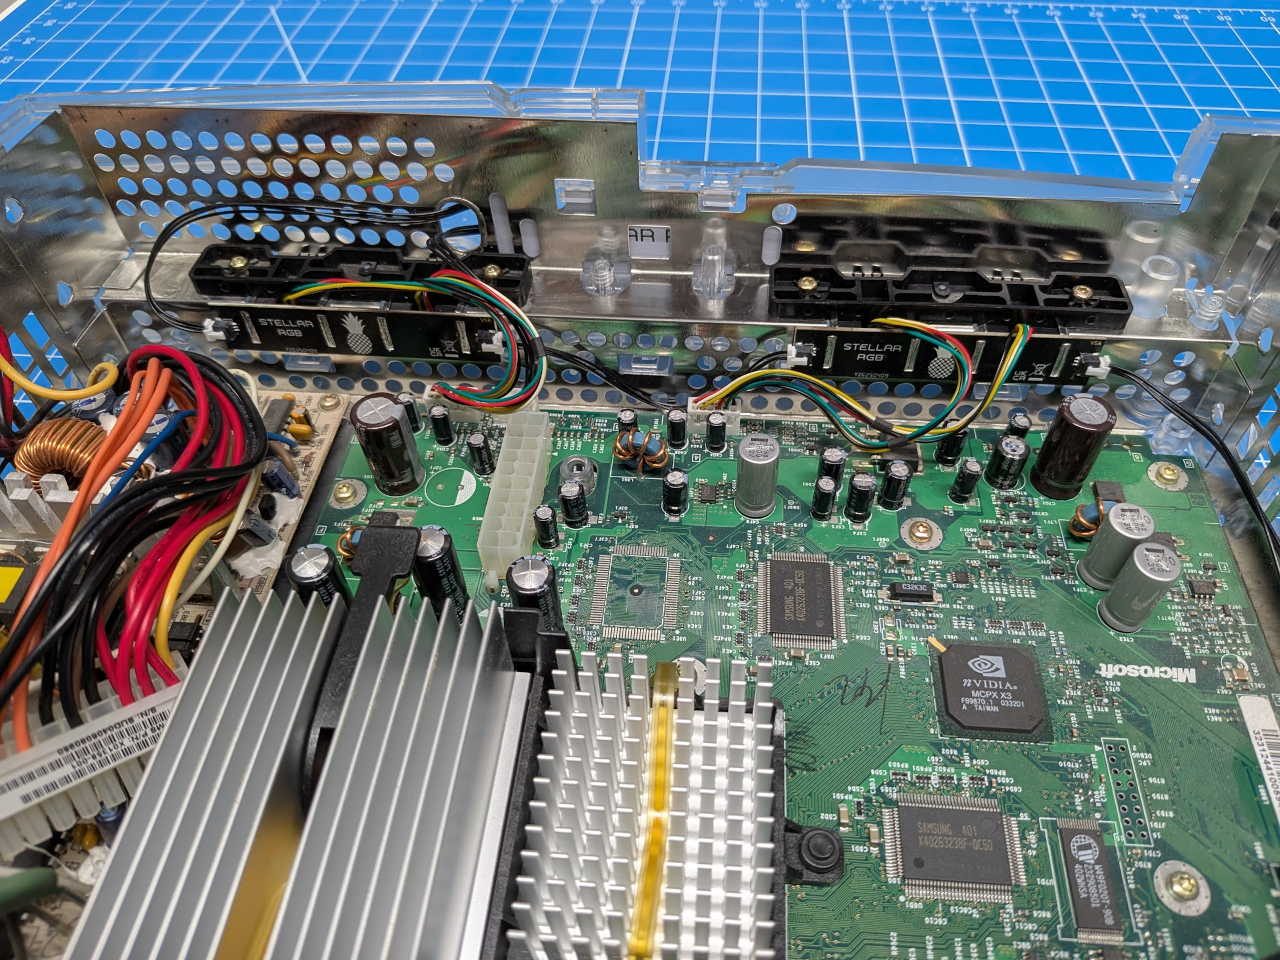
Finally, connect the RGB cable to one of the RGB ports on the Stellar board.
Disconnect Stellar from the LPC header before connecting the RGB cable. This is to avoid stress and damage to the LPC header on Stellar.